Difference between revisions of "Pillar 2"
From Decrypting the NKRYPT sculpture
(Blanked the page) |
|||
| Line 1: | Line 1: | ||
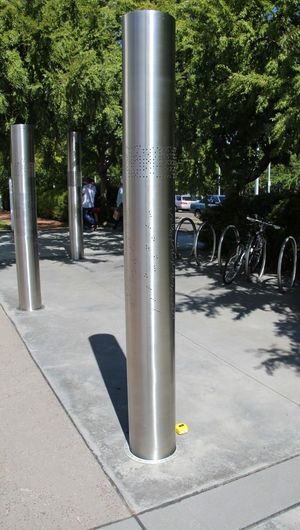
| + | [[File:Pillar_2-Daytime.jpg|thumb|right|Daytime view of Pillar 2 showing the geometric pattern (top) and cog patterns (bottom)]] | ||
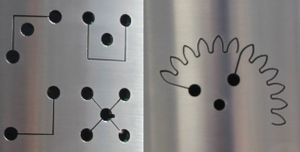
| + | [[File:Pillar_2-Geometric_Cogs.jpg|thumb|right|Representation of the geometric shapes and cogs used on Pillar 2]] | ||
| + | Pillar 2 contains two groups of designs plus a series of numbers on the base. It does not use traditional alphanumeric representations for the main codes. | ||
| + | |||
| + | ==Geometric Code== | ||
| + | [[File:Pillar_2-Geometric_Code.jpg|thumb|right|Large view of the geometric code]] | ||
| + | The top code is a grid of geometrically shapes. These are shown in a grid of 5 rows by 26 columns. There are 26 discrete symbols. | ||
| + | |||
| + | I have given each symbol a letter so that they can be represented here: | ||
| + | |||
| + | {|border="1" | ||
| + | |BEGHIJAKGKHLMCABCZBDEEFACZ | ||
| + | |||
| + | ZDAZAQFNRQDSJANOAPQAJOBGFL | ||
| + | |||
| + | HLTGMAKISKAZPAZZFACZATSAUC | ||
| + | |||
| + | JZACOBDZDCAGOBFZEODJDSOFNP | ||
| + | |||
| + | YVGFEACPAZLCHLMCAVCTTAKZWX | ||
| + | |} | ||
Revision as of 21:48, 9 March 2013
Pillar 2 contains two groups of designs plus a series of numbers on the base. It does not use traditional alphanumeric representations for the main codes.
Geometric Code
The top code is a grid of geometrically shapes. These are shown in a grid of 5 rows by 26 columns. There are 26 discrete symbols.
I have given each symbol a letter so that they can be represented here:
| BEGHIJAKGKHLMCABCZBDEEFACZ
ZDAZAQFNRQDSJANOAPQAJOBGFL HLTGMAKISKAZPAZZFACZATSAUC JZACOBDZDCAGOBFZEODJDSOFNP YVGFEACPAZLCHLMCAVCTTAKZWX |


